Epoxy Metallic Flooring Kits — Tru Lustre Metallic Pigment Systems
Epoxy Metallic Flooring Systems — Every Floor Is One of a Kind
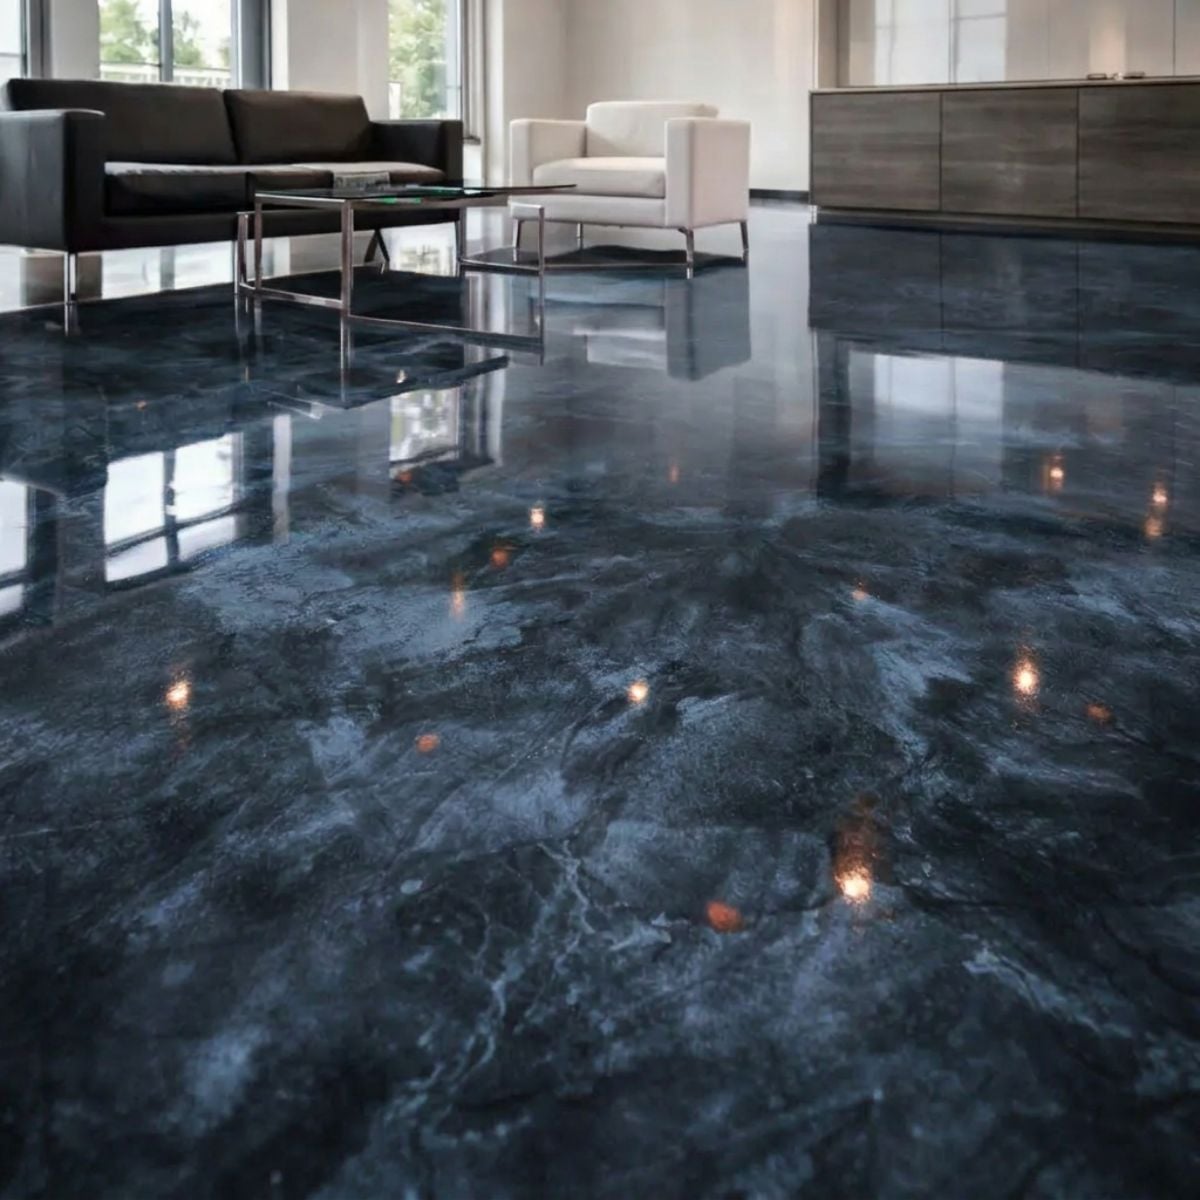
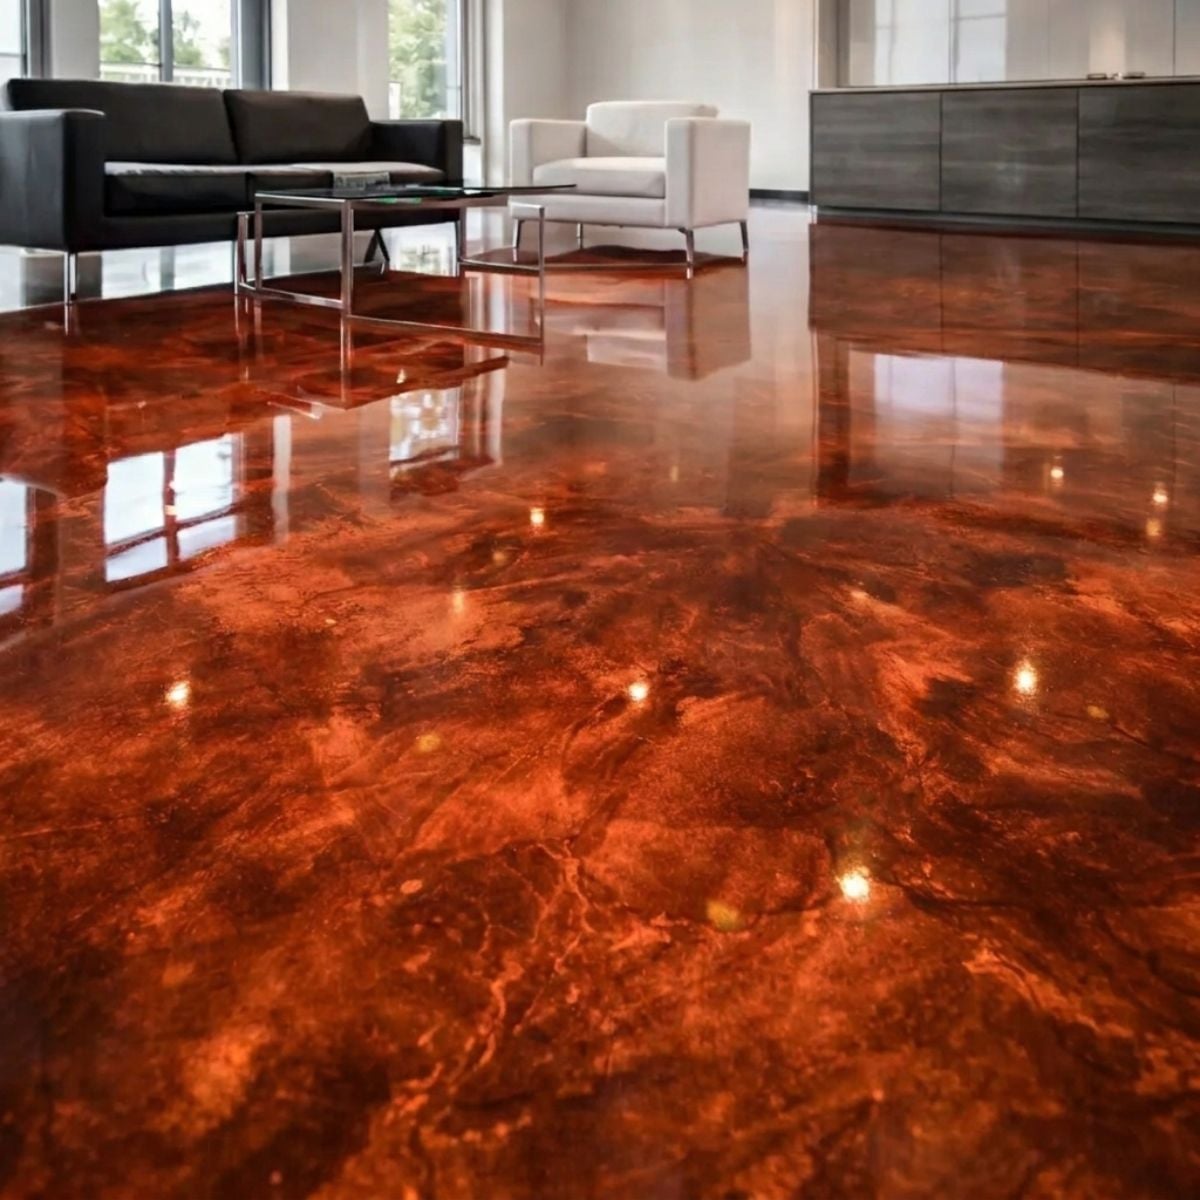
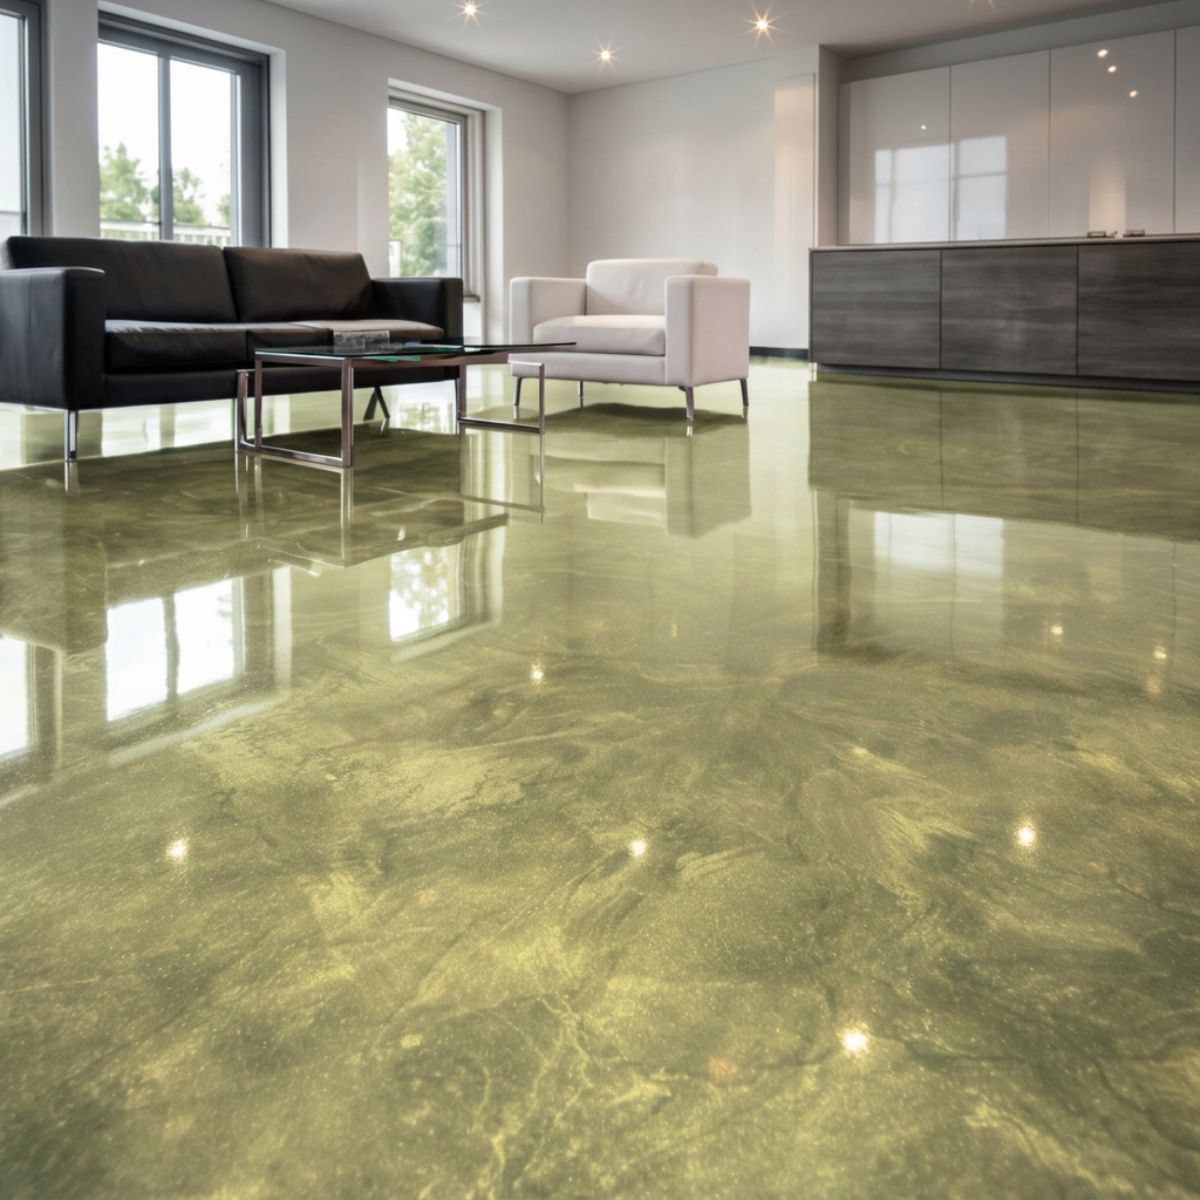
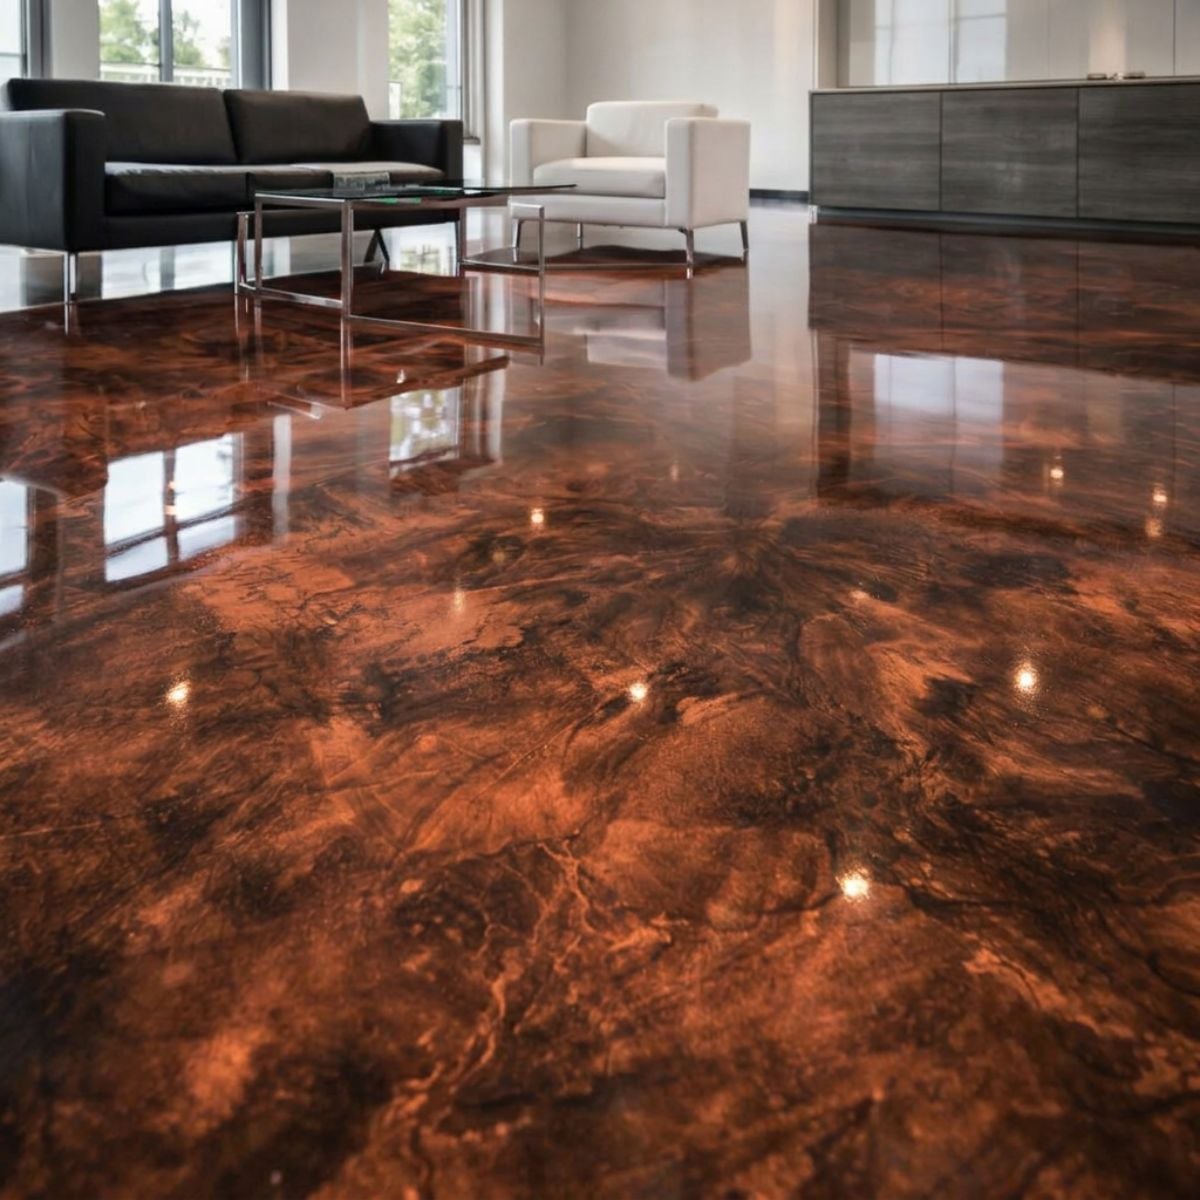
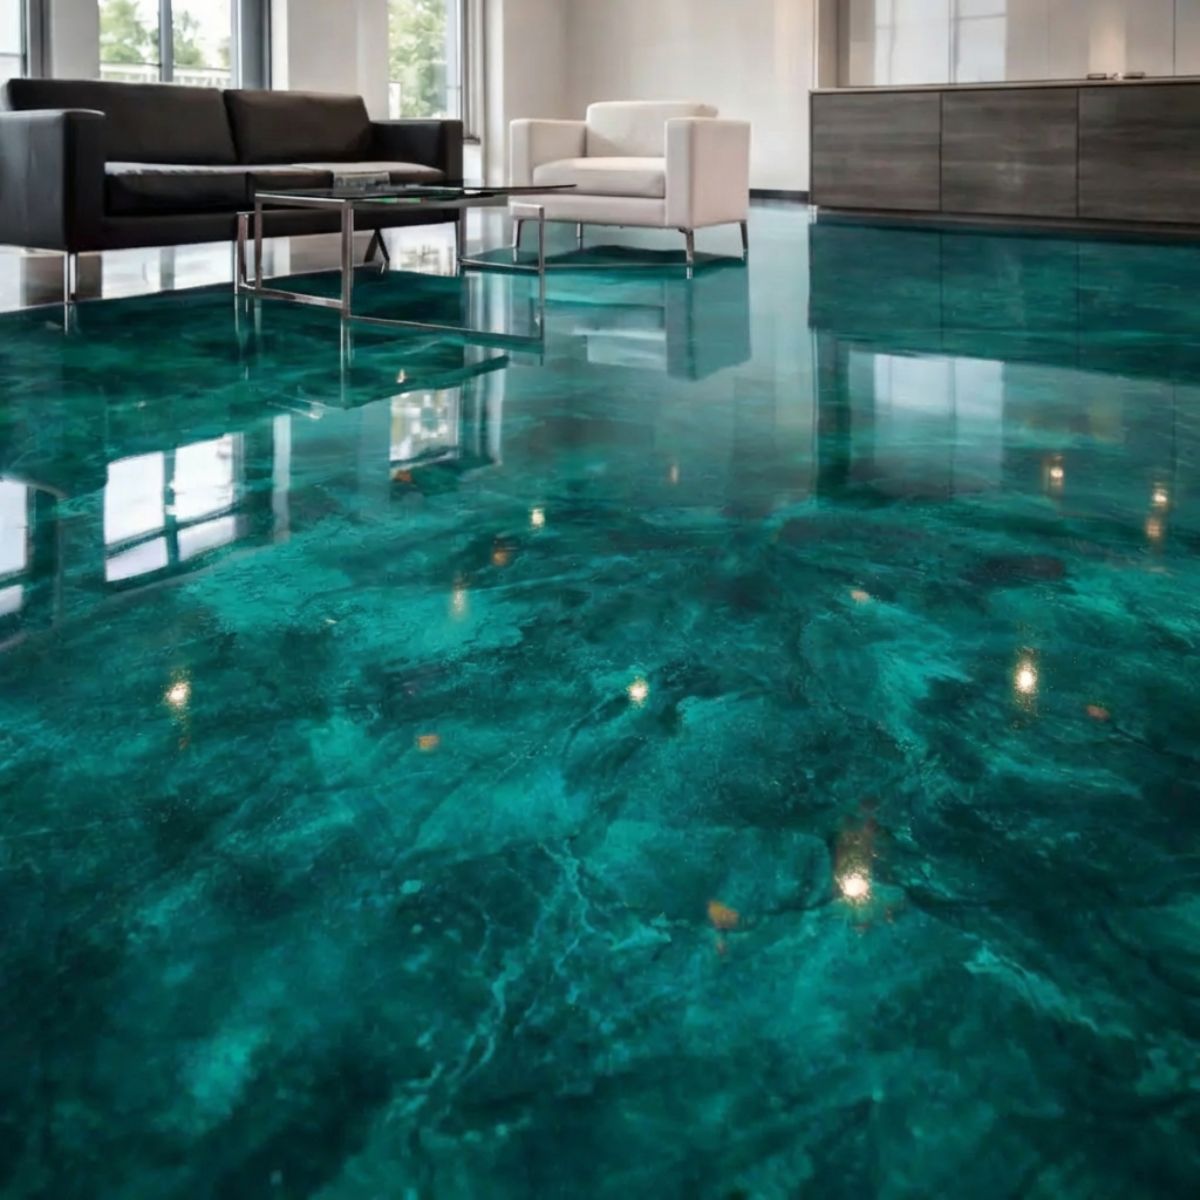
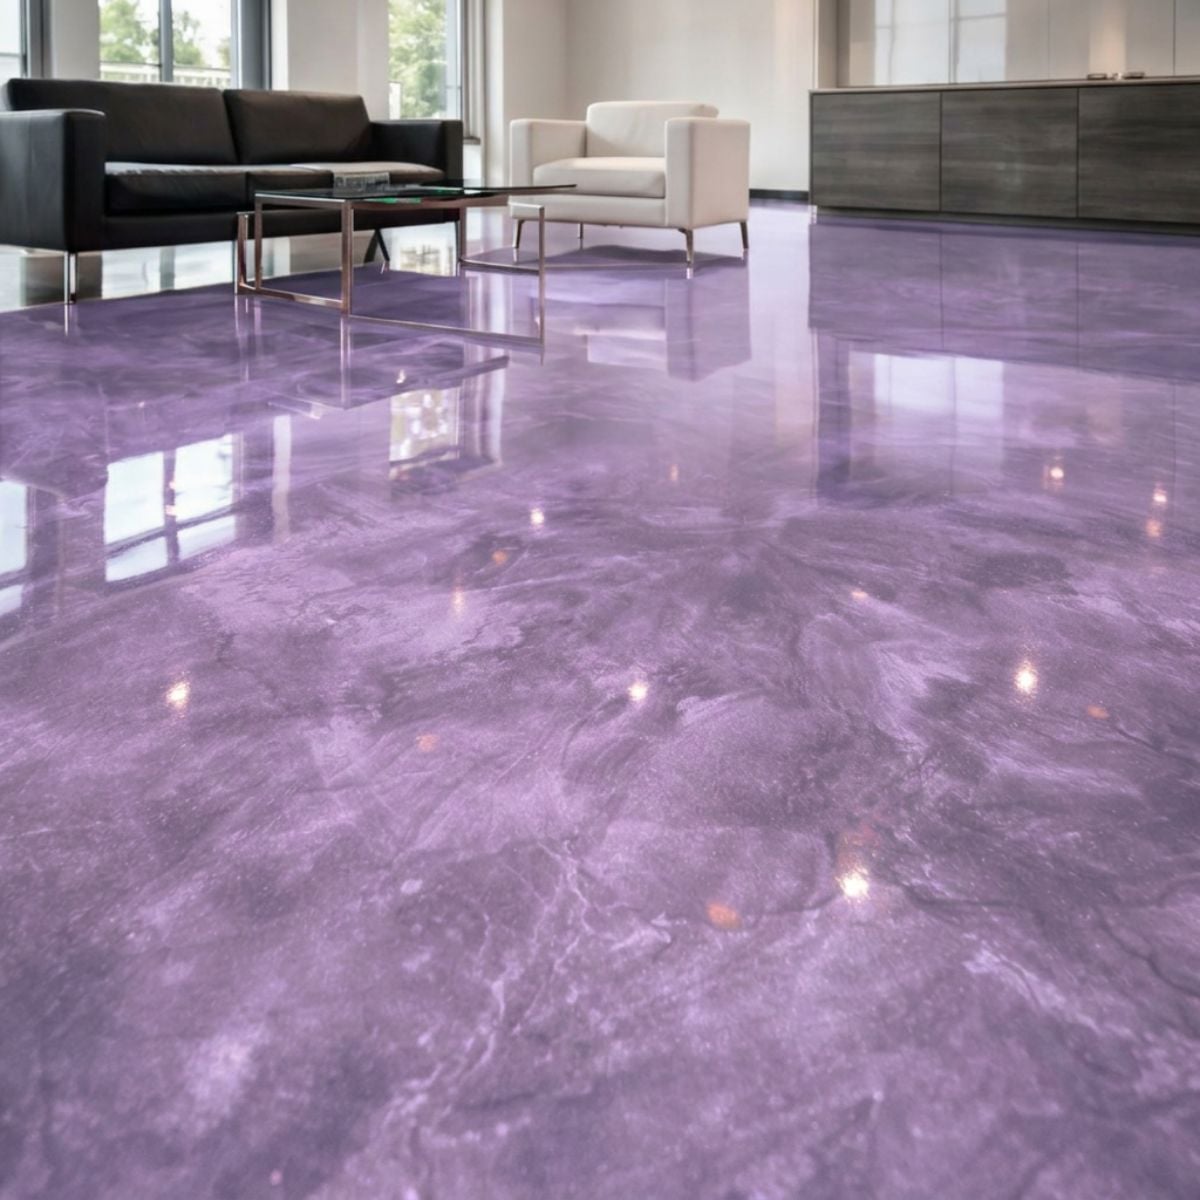
Metallic epoxy is the most visually dramatic floor coating available — and the most customizable. No two floors look alike because the final appearance is shaped by how you work the pigment into the wet resin. Swirling, marbling, feathering, and layering techniques all produce different results. The installer is the artist.
- Surface Preparation — The same as any professional coating system. Grind to CSP-2 or CSP-3, remove all dust thoroughly, repair cracks and control joints before coating. Metallic floors are less forgiving of surface imperfections than broadcast systems because there’s nothing covering the base coat — what’s on the concrete shows through.
- Step 1 — Essential Epoxy Primer (Mandatory) — Unlike chip and quartz systems where primer is conditional, it is required for metallic floors. The primer seals the concrete completely so that bare concrete never peeks through the translucent metallic layer. Without it, porous spots in the concrete absorb metallic resin unevenly and create dull, dead patches in the finish. Applied at 175 sq ft/gal with RZ Tint added at 4 oz per gallon — the tint color is chosen to complement the metallic pigment and creates the background tone that shows through the metallic layer.
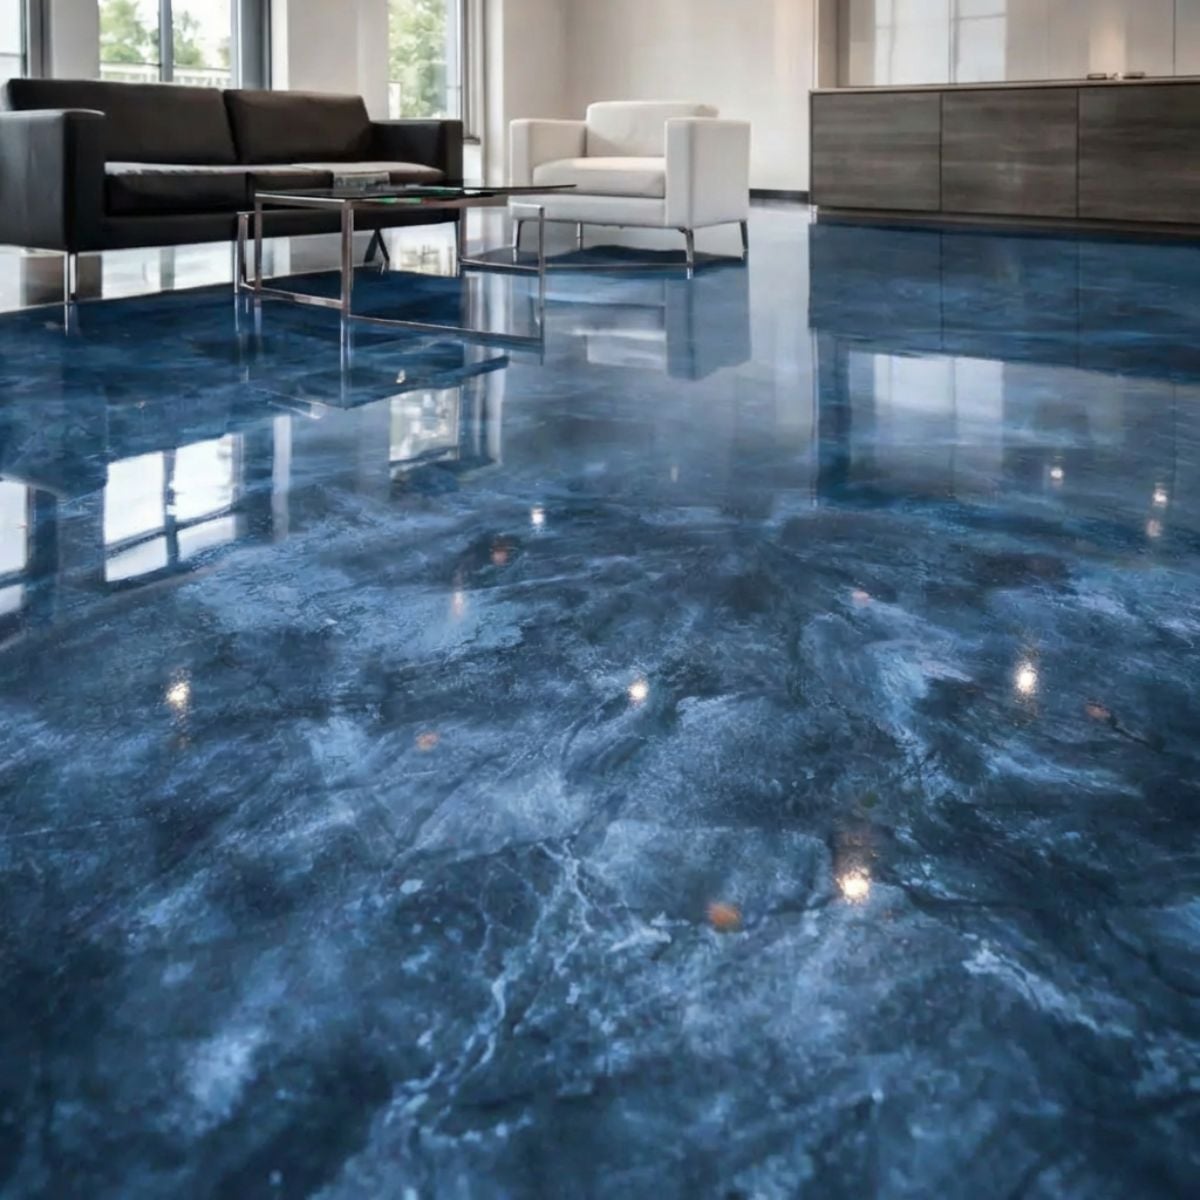
- Step 2 — Epoxy HP Base Coat with Tru Lustre Metallic Pigment — Applied at 75 sq ft/gal — a significantly thicker coat than standard base coats. Tru Lustre Metallic Pigment is added at 4 oz per gallon of resin after mixing. Once the material is poured on the floor, use a squeegee, chip brush, or roller to work the pigment into swirling, flowing patterns. The metallic particles catch light differently depending on their orientation — how you move the material determines the final look. You can blend multiple metallic colors, layer metallics over a solid tinted base, or use contrasting RZ Tint colors in the primer to create dramatic depth effects.
- Step 3 — Top Coat — Choose AU 85 (Aliphatic Urethane) at 250 sq ft/gal for maximum UV, abrasion, chemical, and oil resistance — the highest performance option available. Or choose Polyaspartic 85 at 300 sq ft/gal for a slightly thinner protective coat with excellent UV and abrasion resistance and a faster recoat time. Both top coats are clear and non-yellowing, preserving the metallic finish beneath.
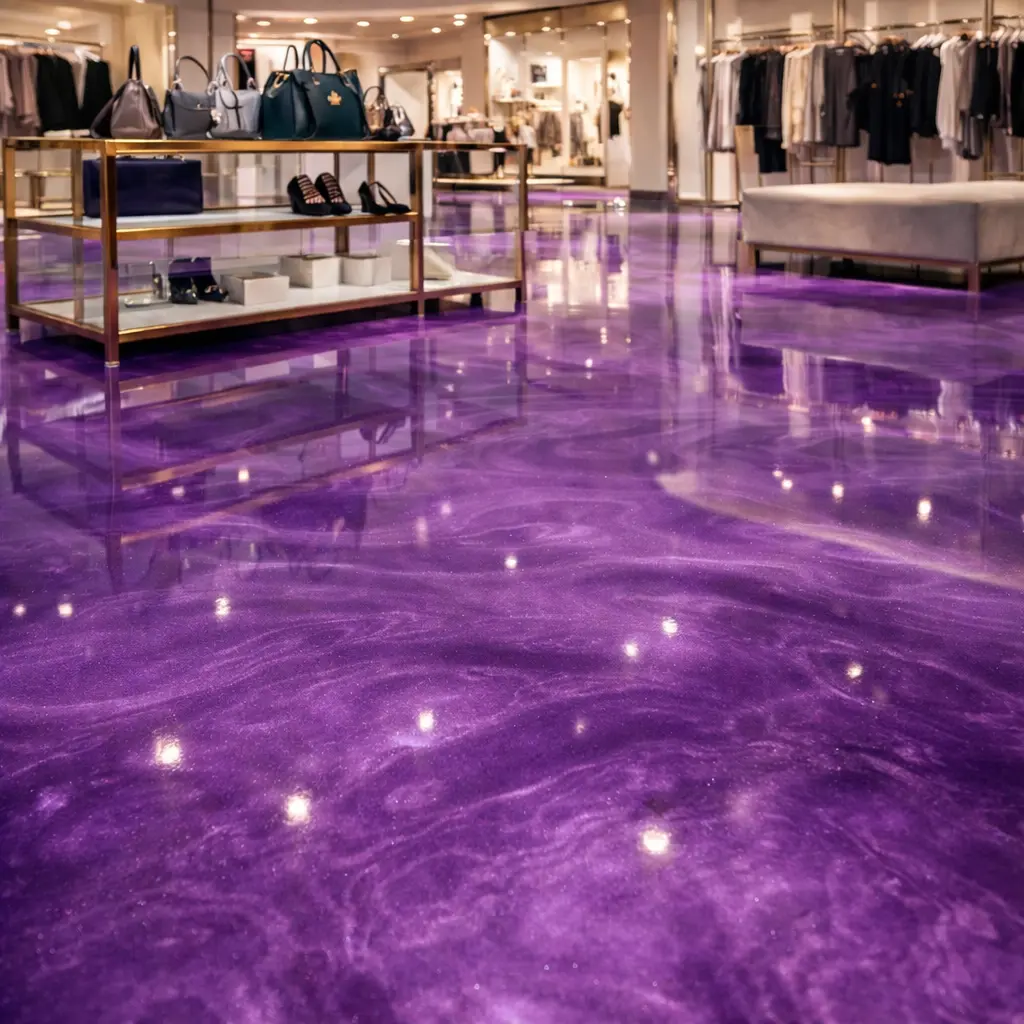
- Unlimited Customization — The looks shown on this page are single-color starting points. In practice, you can combine any number of Tru Lustre colors in a single floor, blend metallics with solid RZ-tinted resin for stark contrast, or vary the technique section by section for a floor that flows and changes across the space. Order extra metallic pigment if you plan to experiment — the cost of an extra container is minor compared to the creative flexibility it gives you.


Epoxy Metallic Flooring Kits — Full System Overview
Every metallic epoxy flooring kit on this page is a complete three-step system: Essential Epoxy Primer with RZ Tint base, Epoxy HP base coat with Tru Lustre Metallic Pigment, and a clear UV-stable top coat. The primer is mandatory on all metallic systems — it seals the concrete completely and creates the background tone that shows through the metallic layer. The table below summarizes each color, the recommended primer tint, coverage rates, and estimated starting cost for a 1-car garage (300 sq ft).
| Metallic Color | Tru Lustre Pigment | Recommended Primer Tint | Coverage Rates | Top Coat Options | Starting Price* |
|---|---|---|---|---|---|
| Epoxy Metallic Flooring Systems — Essential Epoxy Primer + Epoxy HP Base Coat + Tru Lustre Metallic Pigment + Clear Top Coat | |||||
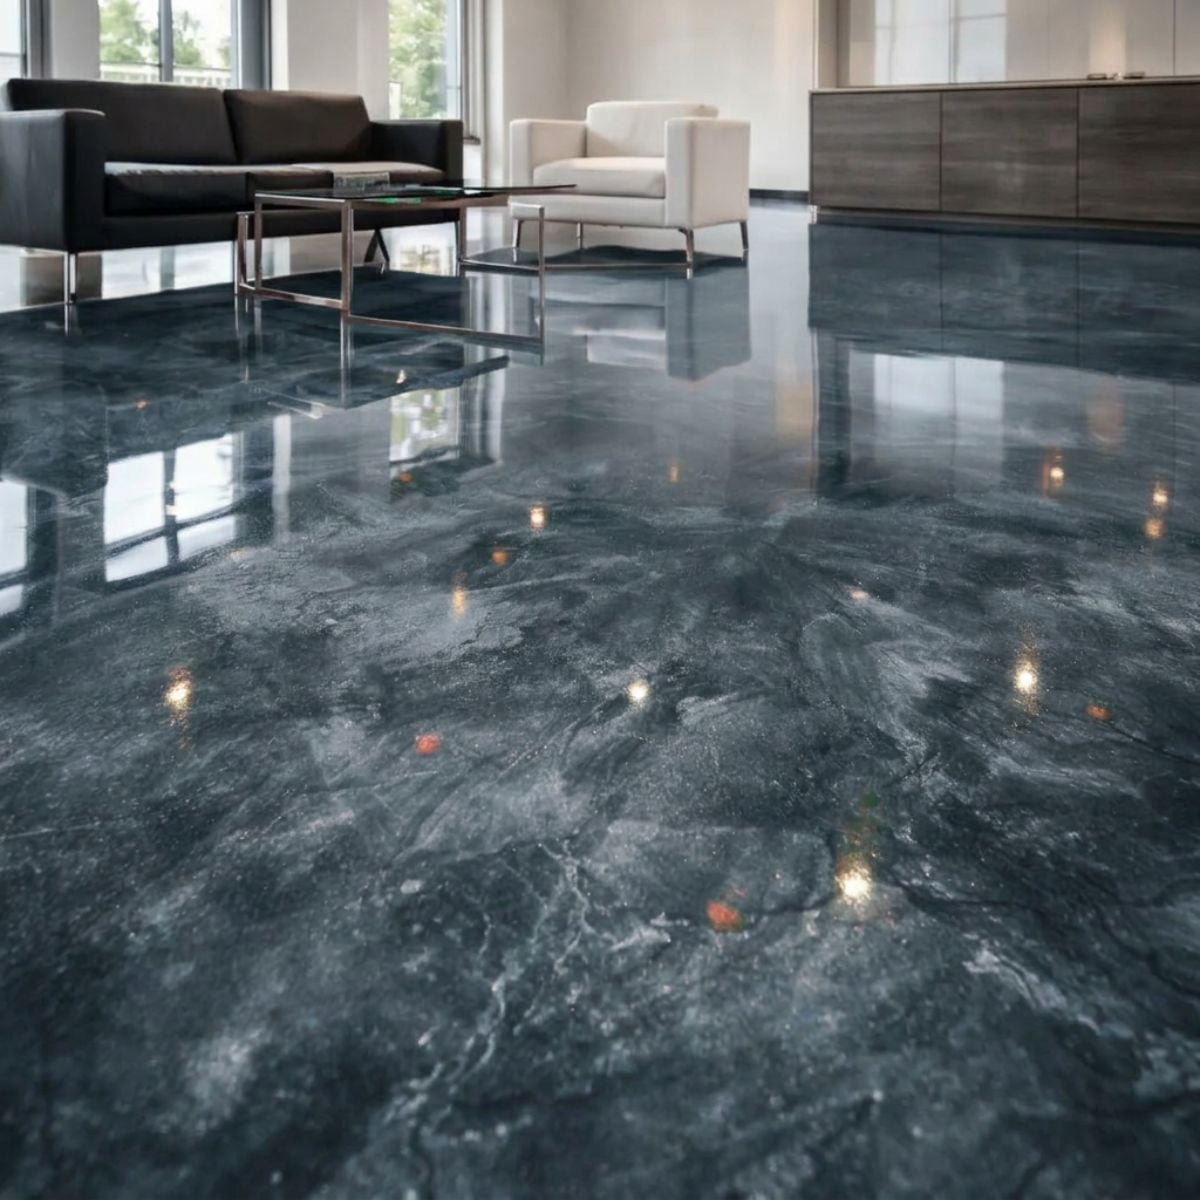
| Battleship | Tru Lustre – Battleship | Dark Gray | Primer: 175 sq ft/gal · Base coat: 75 sq ft/gal · AU 85 top coat: 250 sq ft/gal · Polyaspartic 85 top coat: 300 sq ft/gal · Metallic pigment: 4 oz/gal · RZ Tint: 4 oz/gal | AU 85 Aliphatic Urethane or Polyaspartic 85 | From $862 |
| Copper | Tru Lustre – Copper | Black | Primer: 175 sq ft/gal · Base coat: 75 sq ft/gal · AU 85 top coat: 250 sq ft/gal · Polyaspartic 85 top coat: 300 sq ft/gal · Metallic pigment: 4 oz/gal · RZ Tint: 4 oz/gal | AU 85 Aliphatic Urethane or Polyaspartic 85 | From $862 |
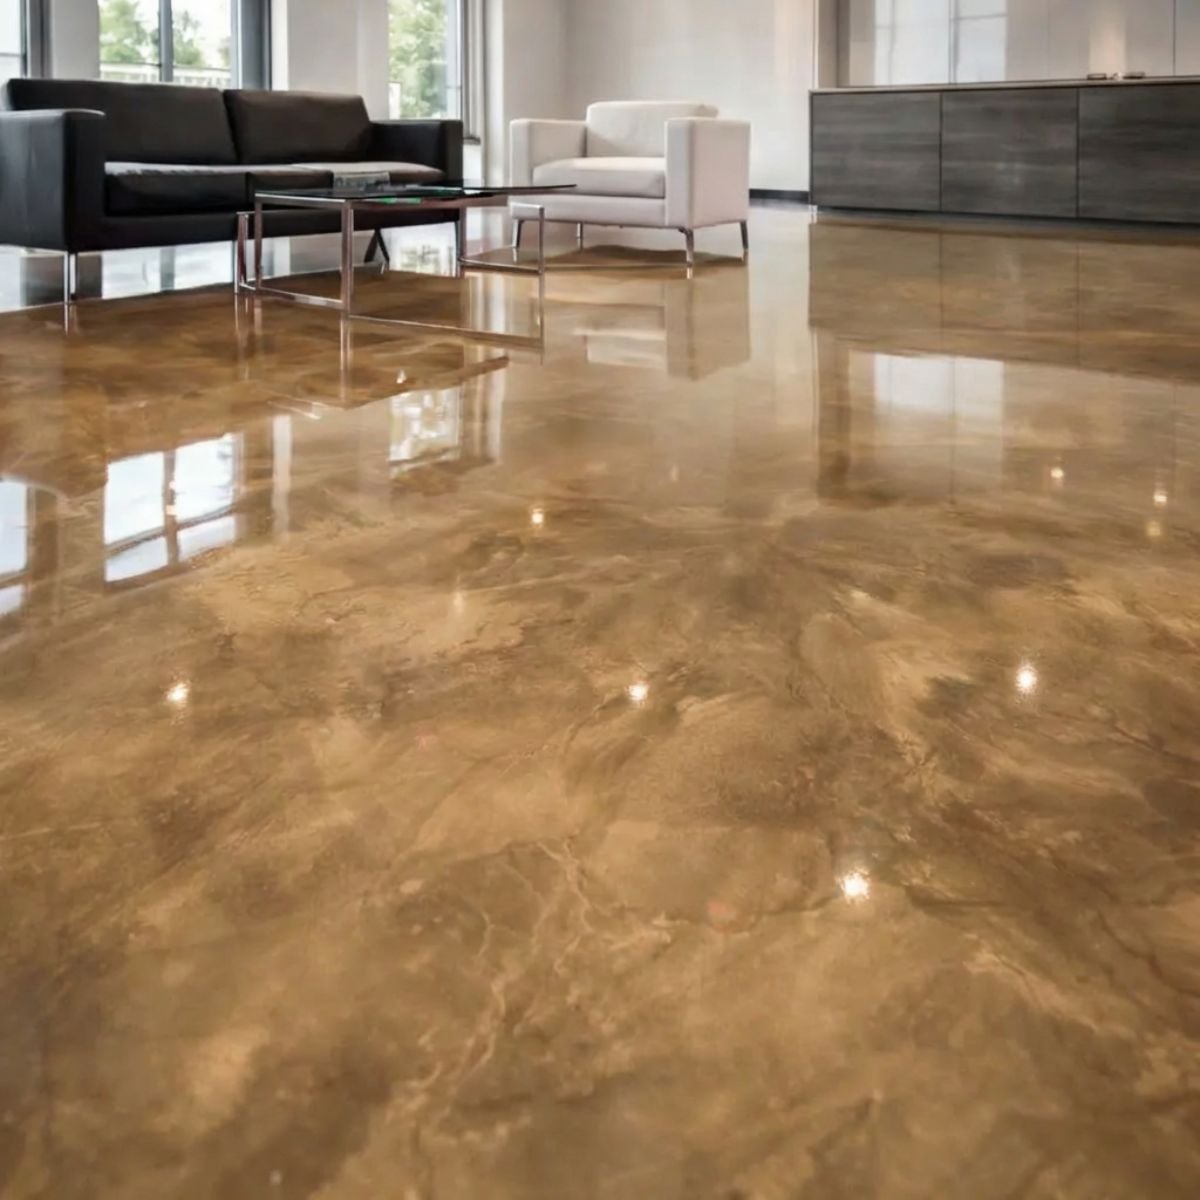
| Egyptian Gold | Tru Lustre – Egyptian Gold | Light Gray | Primer: 175 sq ft/gal · Base coat: 75 sq ft/gal · AU 85 top coat: 250 sq ft/gal · Polyaspartic 85 top coat: 300 sq ft/gal · Metallic pigment: 4 oz/gal · RZ Tint: 4 oz/gal | AU 85 Aliphatic Urethane or Polyaspartic 85 | From $862 |
| Espresso | Tru Lustre – Espresso | Dark Walnut | Primer: 175 sq ft/gal · Base coat: 75 sq ft/gal · AU 85 top coat: 250 sq ft/gal · Polyaspartic 85 top coat: 300 sq ft/gal · Metallic pigment: 4 oz/gal · RZ Tint: 4 oz/gal | AU 85 Aliphatic Urethane or Polyaspartic 85 | From $862 |
| Green Shimmer | Tru Lustre – Green Shimmer | Medium Gray | Primer: 175 sq ft/gal · Base coat: 75 sq ft/gal · AU 85 top coat: 250 sq ft/gal · Polyaspartic 85 top coat: 300 sq ft/gal · Metallic pigment: 4 oz/gal · RZ Tint: 4 oz/gal | AU 85 Aliphatic Urethane or Polyaspartic 85 | From $862 |
| Plum Crazy | Tru Lustre – Plum Crazy | Black | Primer: 175 sq ft/gal · Base coat: 75 sq ft/gal · AU 85 top coat: 250 sq ft/gal · Polyaspartic 85 top coat: 300 sq ft/gal · Metallic pigment: 4 oz/gal · RZ Tint: 4 oz/gal | AU 85 Aliphatic Urethane or Polyaspartic 85 | From $862 |
| Roman Bronze | Tru Lustre – Roman Bronze | Black | Primer: 175 sq ft/gal · Base coat: 75 sq ft/gal · AU 85 top coat: 250 sq ft/gal · Polyaspartic 85 top coat: 300 sq ft/gal · Metallic pigment: 4 oz/gal · RZ Tint: 4 oz/gal | AU 85 Aliphatic Urethane or Polyaspartic 85 | From $862 |
| Rose Gold | Tru Lustre – Rose Gold | White | Primer: 175 sq ft/gal · Base coat: 75 sq ft/gal · AU 85 top coat: 250 sq ft/gal · Polyaspartic 85 top coat: 300 sq ft/gal · Metallic pigment: 4 oz/gal · RZ Tint: 4 oz/gal | AU 85 Aliphatic Urethane or Polyaspartic 85 | From $862 |
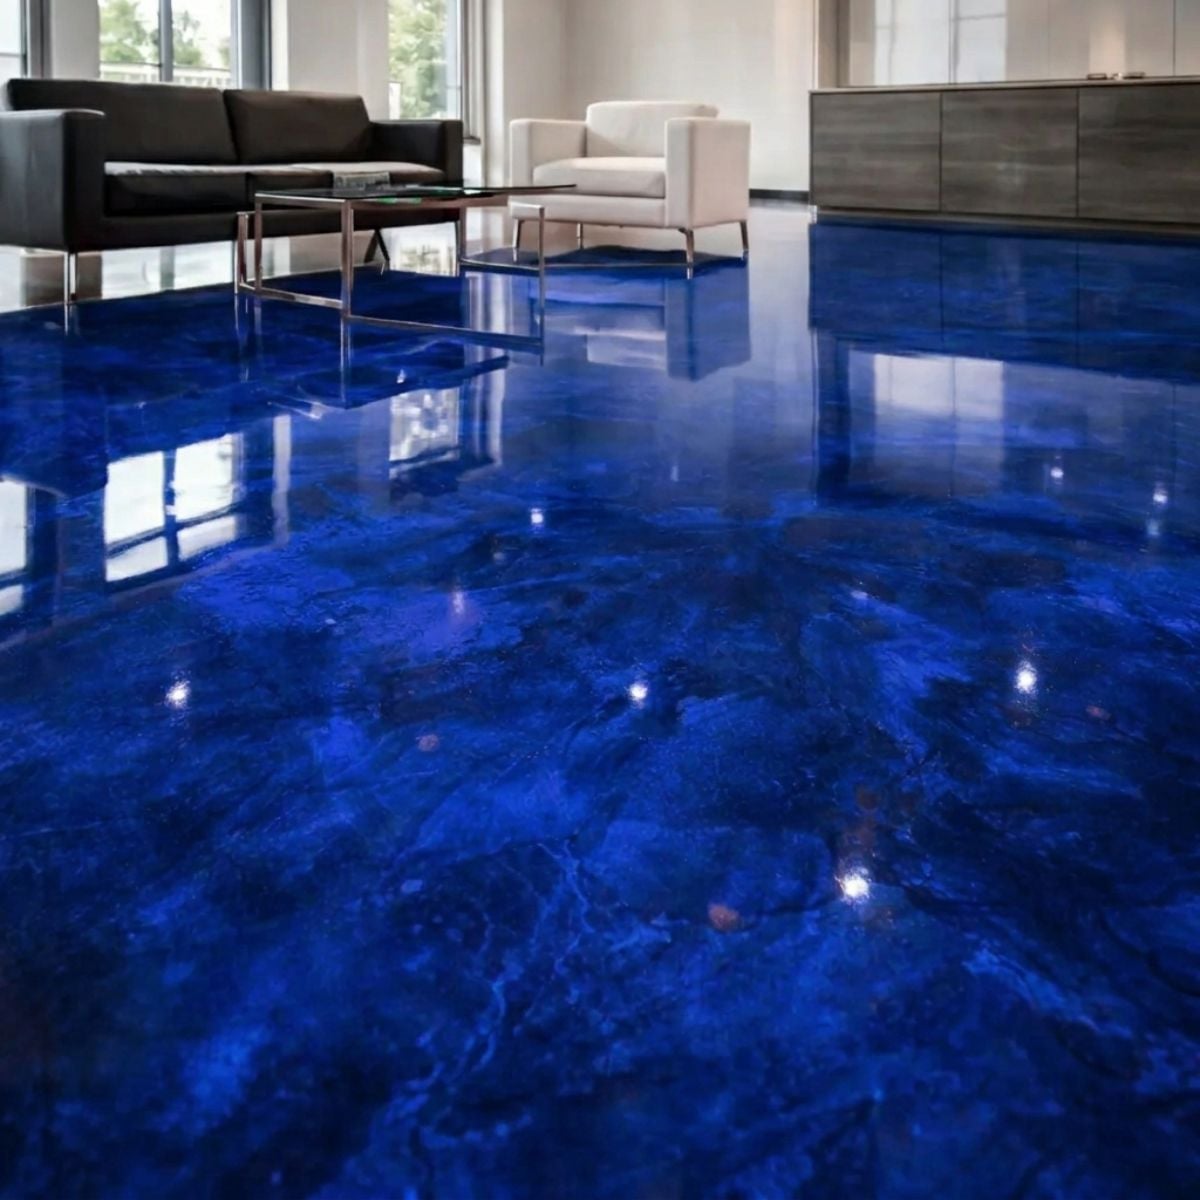
| Royal Blue | Tru Lustre – Royal Blue | Sapphire Blue | Primer: 175 sq ft/gal · Base coat: 75 sq ft/gal · AU 85 top coat: 250 sq ft/gal · Polyaspartic 85 top coat: 300 sq ft/gal · Metallic pigment: 4 oz/gal · RZ Tint: 4 oz/gal | AU 85 Aliphatic Urethane or Polyaspartic 85 | From $862 |
| Ruby Red | Tru Lustre – Ruby Red | Dark Gray | Primer: 175 sq ft/gal · Base coat: 75 sq ft/gal · AU 85 top coat: 250 sq ft/gal · Polyaspartic 85 top coat: 300 sq ft/gal · Metallic pigment: 4 oz/gal · RZ Tint: 4 oz/gal | AU 85 Aliphatic Urethane or Polyaspartic 85 | From $862 |
| Silk Violet | Tru Lustre – Silk Violet | White | Primer: 175 sq ft/gal · Base coat: 75 sq ft/gal · AU 85 top coat: 250 sq ft/gal · Polyaspartic 85 top coat: 300 sq ft/gal · Metallic pigment: 4 oz/gal · RZ Tint: 4 oz/gal | AU 85 Aliphatic Urethane or Polyaspartic 85 | From $862 |
| Silver Pearl | Tru Lustre – Silver Pearl | Light Gray | Primer: 175 sq ft/gal · Base coat: 75 sq ft/gal · AU 85 top coat: 250 sq ft/gal · Polyaspartic 85 top coat: 300 sq ft/gal · Metallic pigment: 4 oz/gal · RZ Tint: 4 oz/gal | AU 85 Aliphatic Urethane or Polyaspartic 85 | From $862 |
| Sparkle | Tru Lustre – Sparkle | Medium Gray | Primer: 175 sq ft/gal · Base coat: 75 sq ft/gal · AU 85 top coat: 250 sq ft/gal · Polyaspartic 85 top coat: 300 sq ft/gal · Metallic pigment: 4 oz/gal · RZ Tint: 4 oz/gal | AU 85 Aliphatic Urethane or Polyaspartic 85 | From $862 |
* Starting price reflects a 1-car garage (300 sq ft) with Polyaspartic 85 top coat. All metallic epoxy flooring systems require a primer coat — it is mandatory, not optional. Epoxy HP base coat is applied at 75 sq ft/gal. Coverage rates are planning estimates and vary based on surface profile, porosity, and application conditions.
Every other coating system on this site produces a result that’s largely determined by the products you choose. Chip and quartz floors look like the chips and quartz you buy. Solid color floors look like the tint you add. Metallic epoxy floors look like what you do with the material after it hits the floor — and that distinction changes everything about how you approach the project.
Tru Lustre Metallic Pigments are ultra-fine metallic particles that are mixed into the Epoxy HP base coat and then worked into flowing, marbled patterns while the resin is still wet. The metallic particles reflect light differently depending on their orientation in the cured film — meaning the same color can look dramatically different based on how it was applied. A swirled, feathered technique produces a cloud-like depth effect. A more aggressive rolling technique produces a bold, high-contrast metallic sheen. Two installers using the same color will produce two completely different floors.
This is the coating system for spaces where the floor is a design statement — showrooms, home theaters, retail environments, reception areas, high-end garages, and anywhere else where a standard chip or quartz floor would feel like an afterthought.
On chip and quartz floors, the primer coat is conditional — you use it when your concrete is porous or shows moisture, and skip it when the surface is tight and dry. On metallic floors, it is always required, and the reason is specific to how metallic coatings work.
The metallic base coat is applied at a thicker mil thickness than a standard base coat, but the metallic pigment particles create a semi-translucent effect where the layer beneath shows through to varying degrees. On a primed surface, what shows through is the tinted primer — a controlled, intentional background color that adds depth to the metallic finish. On an unprimed surface, what shows through is raw concrete — porous, variable, and completely outside your control. The result is dull spots, uneven color, and a floor that looks patchy and unfinished.
The primer coat in a metallic system also serves an aesthetic function beyond sealing. The RZ Tint color added to the primer is chosen to complement the metallic pigment — a dark tinted primer behind a warm metallic creates depth and richness, while a lighter tinted primer behind a cool metallic lets the pigment’s true color read more clearly. The looks shown on this page each have a specific recommended primer tint built into the kit, chosen to work with that particular metallic color.
Metallic epoxy application requires the same discipline as any other professional coating — low-speed mixing, no material sitting in the bucket, working in planned sections — but it adds an artistic dimension that other systems don’t have. Here’s what to understand before you start:
- Mix the resin fully first. Epoxy HP takes 3 minutes of slow mixing before any additives go in. Once the resin is properly mixed, add the Tru Lustre Metallic Pigment at 4 oz per gallon and mix briefly to distribute the pigment evenly. Do not overmix after adding the metallic — you want the pigment incorporated but not broken down.
- Pour in sections. Work the floor in manageable sections the same way you would with any epoxy. Pour ribbons across the section and spread with a squeegee. The metallic pigment will begin moving and orienting as you spread — this is when the visual effect starts to develop.
- Work the surface. After spreading, use a chip brush, roller, or squeegee to create movement in the material. Long, flowing strokes create veining effects. Circular motions create swirls. Pulling the material in from the edges toward the center creates a vortex effect. There is no single correct technique — experimentation is part of the process, and the resin’s working time gives you a reasonable window to develop the pattern before it starts to set.
- Blending multiple colors. If you want to combine metallic colors, apply one color to a section first and begin working it, then pour a second color alongside or over the first and blend the boundary. The two metallic layers will intermix at the edges while remaining distinct in the center, creating natural-looking transitions. Work quickly and plan your color placement before you pour.
- Combining metallic with solid tinted resin. One of the most dramatic effects in metallic flooring is achieved by applying a section of heavily RZ-tinted epoxy adjacent to or over a metallic section and blending the boundary. The solid color creates contrast that makes the metallic layer appear to float or glow. This technique requires two separate batches mixed at the same time and coordinated application.
The metallic base coat requires a clear protective top coat to seal and protect the finish. Both top coat options on this page are UV-stable and non-yellowing — critical for preserving the appearance of the metallic layer beneath. The choice between them comes down to performance level and working preference.
- AU 85 (Aliphatic Urethane) at 250 sq ft/gal — The highest-performing top coat available. Formulated to go on at full working thickness without foaming, delivering superior UV, abrasion, chemical, and oil resistance. AU 85 has a longer working time than polyaspartic, which makes it more forgiving to apply and particularly well-suited for metallic floors where you want time to ensure even coverage over the textured metallic surface. For floors in commercial environments, high-traffic spaces, or anywhere maximum long-term durability is the priority, AU 85 is the right choice.
- Polyaspartic 85 at 300 sq ft/gal — Excellent UV and abrasion resistance with a faster recoat time of 4–6 hours. Goes on slightly thinner than AU 85 at this coverage rate, which means it’s a bit faster to apply over larger areas. A good choice for residential spaces, home garages, and projects where the floor won’t see commercial-level traffic or chemical exposure.
Both options are clear and will not alter the appearance of the metallic finish beneath. Neither will yellow over time. The difference is in the thickness and performance of the protective layer — AU 85 builds a harder, more chemically resistant film; Polyaspartic 85 covers more area per gallon and cures faster.
Surface preparation is important for every coating system — but it is especially unforgiving on metallic floors. Chip and quartz broadcast systems hide minor surface imperfections under layers of broadcast media. Metallic floors do not. Every crack, divot, ghost stain, and patch in the concrete has the potential to show through in the finished floor.
- Grind to CSP-2 or CSP-3. The concrete needs mechanical tooth for the primer and base coat to bond. A walk-behind floor grinder with appropriate diamond tooling is the correct tool. Do not use acid etching as a substitute — it doesn’t create sufficient profile for a professional metallic system.
- Repair cracks and control joints. Fill cracks with sand and epoxy or polyaspartic slurry before the primer coat. Control joints can be filled for a seamless look, understanding that freeze-thaw movement can eventually crack the fill in outdoor or unheated environments.
- Remove all dust. Vacuum thoroughly after grinding. Any dust on the surface will create adhesion failures between the primer and the concrete. With a metallic system, an adhesion failure is visible — the metallic layer will lift or bubble in the affected area and there is no way to hide it.
- Check for moisture. Do the plastic sheet test. If moisture is present, the mandatory primer coat provides some protection, but heavy vapor emission can still cause adhesion problems over time. If your slab shows significant moisture, a vapor barrier epoxy primer should be used before the standard primer coat.
The time you invest in surface preparation on a metallic floor directly determines how good the finished product looks. A perfectly applied metallic system on a poorly prepared slab will look mediocre. The same system on a properly prepped slab looks extraordinary.